Damp patches and sour, earthy odors unsettle any homeowner. Residents and property managers in New Providence, New Jersey, face unique indoor air challenges. Mold damages far more than your wall finish. It actively eats building materials, ruins indoor air quality, and triggers persistent respiratory distress.
You do not need to feel overwhelmed by the cleanup process. You simply need to separate diagnostic testing from physical removal. This guide walks you through every step of professional mold inspection and remediation in New Providence. You will learn what happens from initial detection through final clearance testing.
Why Mold Thrives in New Providence Homes: Climate & Architecture Factors
New Providence brings hot, muggy summers and wet, freezing winters. Outdoor humidity routinely exceeds 70% during July and August. Humid air seeps into crawl spaces, basements, and attics. It hits cold surfaces and deposits liquid condensation. Mold spores quickly find this water. They feed on common materials like framing lumber and drywall paper, expanding their colonies within 48 hours.
Local home architecture adds to the problem. Many homes near the Passaic River basin and Murray Hill feature historic masonry or retrofitted subterranean rooms. Older foundation walls lack modern exterior waterproofing seals. Ground water pushes directly through these walls after heavy rains. Seasonal storms easily overwhelm short downspouts, sending water straight into basements and establishing hidden mold hubs.
Critical Signs You Need Immediate Mold Inspection
Fungi often hide out of view behind baseboards, beneath laminate planks, or inside HVAC vents. Catching early symptoms protects your home and wallet. Call an inspector immediately if you spot these warning signs:
-
Persistent Musty Odors: Earthy smells linger in bedrooms, closets, or basements despite regular cleaning and air fresheners.
-
Visible Discoloration or Patching: Dark spots, fuzzy green patches, or white powdery films spread across drywall, window sills, and ceiling joints.
-
Unexplained Health Symptoms: Family members suffer coughing spells, itchy eyes, skin rashes, and nasal congestion that disappear outdoors.
-
Past Water Incidents: Plumbing breaks, washing machine overflows, roof leaks, and sump failures leave hidden moisture pools behind.
-
Bubbling Paint or Warped Drywall: Peeling paint layers, spongy trim boards, and sagging sheetrock signal wet pockets inside wall cavities.
Phase 1: The Professional Mold Inspection Process
A professional inspection uncovers hidden colonies and identifies the exact water source feeding them.
Visual Assessment & Moisture Mapping
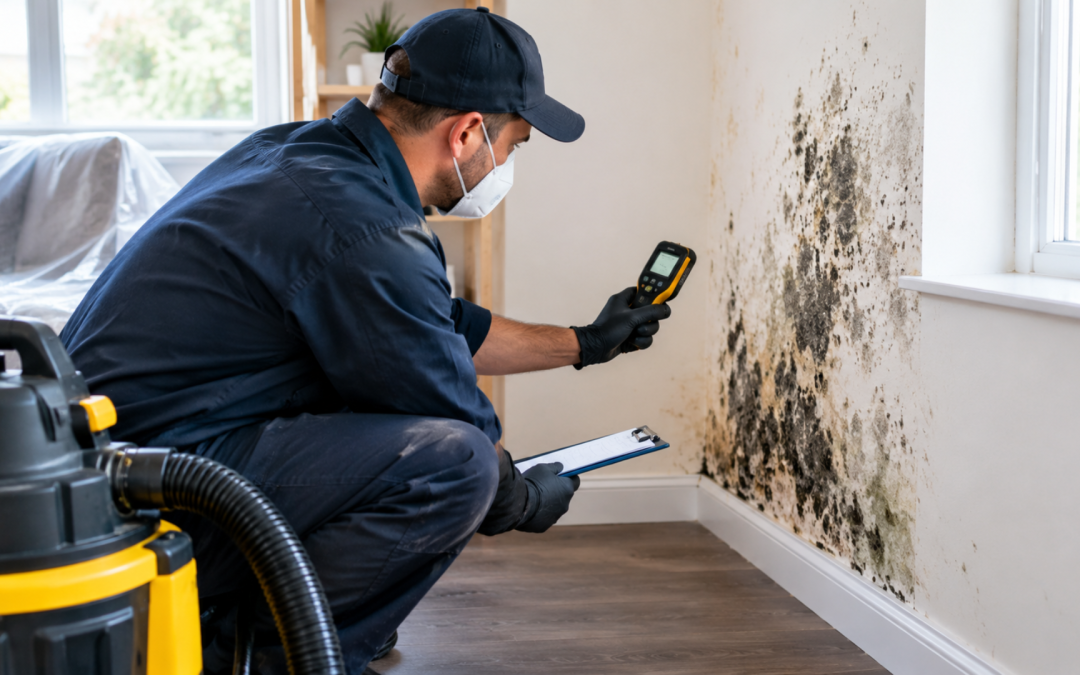
The inspector first examines the property from top to bottom. They scan walls with infrared thermal imaging cameras to pinpoint cold, wet pockets inside insulated cavities. They press pinless and penetrating moisture meters against drywall, subfloors, and studs. These tools reveal whether building materials exceed safe baseline limits (typically 15% moisture content for wood).
Environmental Sampling & Laboratory Testing
Inspectors cannot diagnose airborne spores through sight alone. They set up calibrated air pumps that draw exact air volumes across specialized capture cassettes. They always pull outdoor control samples alongside indoor tests to build an ecological baseline. If indoor air shows higher spore concentrations than outdoor air, an active indoor colony exists. Inspectors also pull physical tape-lift and swab samples from visible stains, rushing them to an accredited environmental testing laboratory for microscopic analysis.
Understanding Your Mold Inspection Report
The laboratory processes the samples, and the inspector issues a detailed technical report. This document maps out the entire cleanup scope. Your report breaks down the following components:
-
Spore Concentration Counts: Tables show raw spore tallies alongside total calculated spore counts per cubic meter of air ($spores/m^3$).
-
Fungal Genus and Species: The lab identifies dominant strains, distinguishing common outdoor varieties like Cladosporium from dangerous water-damage molds like Aspergillus/Penicillium, Chaetomium, and Stachybotrys chartarum.
-
Moisture Source Identification: The text pinpoints the plumbing leaks, roof failures, or high humidity pockets causing the growth.
-
Remediation Protocol: The inspector creates explicit cleanup instructions that outline containment steps, teardown limits, and final clearance targets.
Phase 2: What Happens During Professional Mold Remediation?
If lab tests show heavy contamination, professional remediation starts immediately. Certified crews follow strict industry benchmarks, such as the IICRC S520 standard.
-
Building Containment Zones: Crews hang heavy 6-mil plastic sheets across doorways and set up zippered entry airlocks to trap spores inside the work zone.
-
Generating Negative Air Pressure: Technicians place commercial HEPA air scrubbers inside containment and vent filtered exhaust air outside to stop airborne spores from escaping through cracks.
-
Removing Porous Materials: Technicians cut out water-soaked drywall, insulation, and ruined carpeting, sealing the contaminated debris inside thick bags before carrying it out.
-
Scrubbing and HEPA Vacuuming: Workers vacuum exposed joists, studs, and subfloors with commercial HEPA units, then scrub every surface with EPA-registered antimicrobial solutions.
-
Encapsulating and Structural Drying: Crews coat stripped framing with clear, mold-resistant sealants and run heavy-duty dehumidifiers until wood moisture drops below safe levels.
Mold Inspection vs. Mold Remediation: Key Distinctions
Testing and cleanup involve separate skills, specialized equipment, and different ethical standards. This breakdown clarifies the two roles:
| Feature | Professional Mold Inspection | Professional Mold Remediation |
| Primary Objective | Detect spores, map locations, and find water sources | Isolate spaces, tear out damaged materials, and scrub surfaces |
| Primary Tools | Infrared cameras, moisture meters, and air cassettes | Negative air machines, HEPA vacuums, and EPA biocides |
| Key Deliverable | Lab analysis report and written cleanup protocol | Certificate of Completion and final clearance papers |
| Project Length | 1 to 2 hours on-site (plus 2–3 days for lab results) | 1 to 5 work days depending on contamination size |
| Best Practice Standard | Separate diagnostic firm to prevent conflicts of interest | Dedicated IICRC-certified remediation company |
Estimated Costs of Mold Services in New Jersey
Total project costs depend on total room square footage, work accessibility (like crawl spaces versus open basements), and required structural demolition.
-
Basic Visual Inspection: $150 to $300
-
Full Inspection with Air/Surface Lab Samples: $350 to $650
-
Localized Remediation (Small bathroom, attic nook, or crawl space): $1,500 to $3,000
-
Extensive Structural Remediation (Full basement, framing, or HVAC overhaul): $4,000 to $9,000+
Post-Remediation Verification (PRV): The Clearance Test
Never let a contractor tear down plastic containment walls before an inspector completes Post-Remediation Verification (PRV). This final audit confirms total project success.
An independent assessor inspects the work zone under high-intensity halogen lights. They verify that the team removed all dust, fungal growth, and building debris. The inspector then sets up air cassettes inside the sealed area while air scrubbers run in neutral mode. You receive formal clearance only when the lab proves that indoor spore counts match or beat clean outdoor air levels (Condition 1 status).
Long-Term Mold Prevention Strategies for New Providence Properties
Once technicians clear your property, simple preventative habits keep moisture from returning:
-
Control Indoor Humidity: Run dedicated basement and crawl space dehumidifiers from May through October to hold relative humidity below 50%.
-
Direct Exterior Water Away: Scoop out roof gutters every spring and autumn, and extend downspout drains at least 6 to 10 feet past foundation edges.
-
Vent High-Moisture Rooms Outside: Run bathroom and kitchen exhaust fans every time you cook or shower, routing ductwork directly through exterior walls.
-
Maintain Sump Equipment: Clean basement sump basins, remove gravel from intake valves quarterly, and connect a heavy-duty battery backup system before major storms hit.
How to Choose a Certified Mold Professional in Union County
Hiring qualified, honest specialists protects your financial assets and family health. Use this checklist during your search:
-
Verify Recognized Industry Certifications: Demand credentials from reputable professional bodies like the IICRC (AMRT status) or the ACAC (CIEC or CMR designations).
-
Hire Separate Companies: Choose an independent diagnostic inspector for testing and clearance, keeping them separate from the remediation crew to avoid conflicts of interest.
-
Check Pollution Insurance: Make sure the remediation contractor carries explicit Environmental and Pollution Liability Insurance alongside standard general contractor coverage.
-
Demand Written, Itemized Estimates: Insist on detailed proposals that explicitly outline containment steps, demolition boundaries, waste disposal plans, and clearance requirements.
Other Post: